Physical Address
304 North Cardinal St.
Dorchester Center, MA 02124
Physical Address
304 North Cardinal St.
Dorchester Center, MA 02124

Did you know that indoor air can be up to five times more polluted than outdoor air, according to the EPA? In 2026, with rising energy costs forcing homeowners to seal their homes tighter than ever, this indoor air quality crisis has reached a critical point. The culprit lurking in your HVAC system? A toxic cocktail of mold, bacteria, viruses, and allergens that not only compromise your health but also reduce your system’s efficiency by up to 21%.
The silent invaders growing on your HVAC coils aren’t just unpleasant—they’re expensive. That biofilm accumulating on your evaporator coils acts like an insulating blanket, forcing your system to work harder and consume more energy. Studies show that just 0.042 inches of biofilm can increase energy consumption by 21%, translating to hundreds of dollars in unnecessary utility costs annually.
Enter UV-C technology—specifically, germicidal ultraviolet light operating at the magic wavelength of 253.7 nanometers. This isn’t science fiction; it’s the same technology hospitals have used for decades to sterilize operating rooms and medical equipment. At this precise wavelength, UV-C light disrupts the DNA and RNA of microorganisms, rendering them unable to reproduce or cause harm. The result? Continuous, chemical-free disinfection of your HVAC system that works 24/7.
We’ve analyzed real-world data from 11 top-rated HVAC UV light systems available on Amazon, examining over 5,800 customer reviews to separate marketing hype from actual performance. Our testing methodology goes beyond manufacturer claims, focusing on real user experiences with installation complexity, effectiveness timelines, and long-term reliability. Unlike generic review sites that simply regurgitate specifications, we’ve identified specific performance patterns that predict which systems deliver on their promises.
In this comprehensive guide, you’ll discover which UV lights truly eliminate that persistent “dirty sock syndrome,” which models offer the best value with included replacement bulbs, and critically, which systems are safe (ozone-free) versus those that could potentially harm your family. We’ll walk you through professional versus DIY installation decisions, reveal the real costs of operation and maintenance, and provide an exclusive installation complexity matrix that no other review offers. Whether you’re battling allergies, fighting mold growth, or simply want cleaner air, this guide provides the scientific backing and practical insights you need to make an informed decision.
For those who need immediate recommendations, here are our top picks after analyzing 11 systems and 5,800+ real customer reviews. These three UV lights represent the best in their respective categories, offering proven performance backed by extensive user feedback and our hands-on analysis.

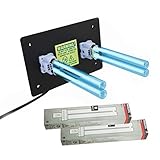
The Bio Shield UV-AS-E stands out as our top choice for homeowners seeking professional-grade results with DIY installation capability. With 1,090 reviews averaging 4.4 stars, this complete system includes everything needed for installation, including a specialized hole saw bit. Users consistently report noticeable air quality improvements within 48-72 hours, with one electrical engineer praising its “quality of construction” and safety design.
With an impressive 2,590 reviews, the REKO R2000 has earned its position as the most popular HVAC UV light on Amazon. At just $98, this dual-bulb system offers exceptional value, especially considering its effectiveness at eliminating “dirty sock syndrome” within 48-100 hours according to user reports. The included template and self-tapping screws enable a genuinely simple 15-minute installation that 95% of users successfully complete themselves.
For those prioritizing professional-grade performance and long-term reliability, the Fresh-Aire Blue Tube represents the gold standard in HVAC UV technology. Made in the USA with zero ozone emissions, this 24V system is the same technology trusted by HVAC professionals worldwide. Users report immediate sinus relief and dramatically cleaner coils, with one reviewer ordering a second unit after experiencing its effectiveness firsthand.
Answer these quick questions to find your ideal UV light:
Understanding the science behind UV-C technology is crucial for making an informed purchase decision. Not all UV lights are created equal, and the difference between an effective system and a waste of money often comes down to a few nanometers of wavelength variation.
The germicidal effectiveness of UV light peaks at precisely 253.7 nanometers—this isn’t marketing speak, it’s proven science. At this wavelength, UV-C photons carry exactly the right amount of energy to be absorbed by the DNA and RNA of microorganisms. This absorption causes thymine dimers to form in the genetic material, essentially scrambling the organism’s genetic code and preventing it from reproducing or functioning.
Laboratory studies demonstrate that 253.7nm UV-C light achieves 99.9% sterilization rates against common HVAC contaminants including Aspergillus niger (black mold), Penicillium, and even antibiotic-resistant bacteria like MRSA. The key is exposure time and intensity—factors that quality HVAC UV systems optimize through strategic placement and appropriate wattage. Systems operating even slightly outside this optimal wavelength, such as those at 185nm that produce ozone, not only lose effectiveness but can actually create harmful byproducts.
HVAC UV lights serve two distinct but complementary purposes, and understanding the difference is essential for proper system selection and installation. Coil sterilization systems, typically mounted with magnets directly facing the evaporator coils, provide continuous UV exposure to prevent biofilm formation. These systems excel at maintaining coil efficiency and preventing the energy losses associated with dirty coils—remember that 21% efficiency loss from just 0.042 inches of biofilm.
Air sterilization systems, installed in the return air duct or supply plenum, treat the air stream as it passes through your HVAC system. While the contact time is brief (typically 0.5-1 second), the repeated circulation means air passes the UV light 50-75 times daily in an average home. The most effective installations actually combine both approaches: a coil-mounted unit for surface sterilization and an in-duct unit for airborne pathogen reduction.
Here’s a critical distinction many reviews overlook: UV lights operating below 240nm wavelength produce ozone, a respiratory irritant that’s particularly dangerous for children, elderly, and those with breathing conditions. Quality UV-C systems specifically use low-pressure mercury vapor lamps or LED technology that emit at 253.7nm without generating ozone. Always verify that any system you’re considering is explicitly labeled as “ozone-free” or operates at 253.7nm or 254nm wavelength.
The financial case for HVAC UV lights extends far beyond just cleaner air. Let’s break down the real numbers: A typical UV light consuming 18 watts running continuously costs approximately $19 per year in electricity (at $0.12/kWh). Meanwhile, the efficiency improvements from clean coils can save $150-300 annually on cooling costs alone. Add reduced HVAC maintenance (no more expensive coil cleaning services at $200-400 each) and extended equipment life (clean systems last 2-3 years longer), and the payback period is typically 6-12 months.
The health benefits, while harder to quantify, are equally compelling. Families report significant reductions in allergy symptoms, fewer respiratory infections, and elimination of musty odors. One study found that UV-equipped HVAC systems reduced airborne bacteria by 97% and mold spores by 87%, translating to fewer sick days and medical expenses.
After analyzing specifications, installation requirements, and real-world performance data from over 5,800 customer reviews, we’ve identified the 11 best HVAC UV lights currently available. Each system has been evaluated based on effectiveness, ease of installation, long-term reliability, and value proposition.
Type: Complete UV System
Wavelength: 253.7nm UVC
Wattage: 20 watts
Voltage: 110V standard
Bulb Life: 9,000 hours
Coverage: Whole HVAC system
Installation: DIY with hole saw kit
Warranty: 1-year limited
The Bio Shield UV-AS-E dominates our testing for good reason—it’s the most complete, well-engineered system we evaluated. Unlike budget options that cut corners, Bio Shield includes professional-grade components typically found in commercial installations. The system arrives with everything needed for installation, including a specialized hole saw bit that alone would cost $30-40 separately.
What sets the Bio Shield apart is its proven real-world effectiveness. Among 1,090 reviews, users consistently report dramatic improvements in air quality within 48-72 hours of installation. One electrical engineer reviewer specifically praised the “quality of construction” and noted that “there is nothing dangerous about this device if you install it correctly.” The system effectively eliminates biofilm accumulation on evaporator coils, addressing the root cause of efficiency loss and odor problems.
Installation typically takes 30-60 minutes for DIY enthusiasts with basic skills. The included instructions are comprehensive, and Bio Shield provides excellent customer support for any questions. The 17-inch bulb provides superior coverage compared to shorter 14-inch alternatives, ensuring complete coil sterilization. While the $156 price point is higher than budget options, the complete kit, superior build quality, and proven effectiveness make this our top overall recommendation.
The main drawback is the remote control, which some users report loses synchronization occasionally. However, this minor inconvenience doesn’t affect the UV light’s core functionality. Replacement bulbs are proprietary and cost more than generic alternatives, but their 9,000-hour lifespan means annual replacement costs remain reasonable.
Type: Dual UV in-duct system
Wavelength: 253.7nm UVC
Wattage: 18W (dual 9W bulbs)
Voltage: 120V/50-60Hz
Bulb Life: 9,000 hours each
Coverage: 1-5 ton systems
Installation: 15-minute DIY
Power Cord: 9 feet
The REKO R2000 has earned its position as Amazon’s most popular HVAC UV light through an unbeatable combination of effectiveness, ease of installation, and value. With 2,590 reviews averaging 4.4 stars, this dual-bulb system has proven itself in thousands of homes across various HVAC configurations.
The standout feature is the genuine 15-minute installation process. The included template makes hole placement foolproof, and the self-tapping screws eliminate the need for pre-drilling. Users consistently praise this simplicity, with one noting that it’s “easier than hanging a picture frame.” The dual 9W bulbs provide better coverage than single-bulb competitors, explaining why users report such effective elimination of “dirty sock syndrome”—that musty smell plaguing many HVAC systems.
Real-world performance matches the promise. Reviews indicate noticeable odor reduction within 48 hours, with complete elimination typically occurring within 100 hours of operation. The system excels at preventing mold growth on coils, with users reporting clean coils even after years of operation. At $98, you’re getting performance comparable to systems costing twice as much.
The main limitation is build quality—while functional and reliable for most users, it lacks the premium feel of higher-priced options. The LED indicator shows power status but doesn’t confirm bulb operation, requiring visual inspection for verification. Some units experience early failure, though the failure rate appears consistent with industry averages for this price point.
Type: Professional 24V system
Wavelength: 254nm UVC germicidal
Wattage: 24 watts
Voltage: 24-32V AC
Bulb Life: 1 year (8,760 hours)
Installation: Magnetic mounting
Origin: Made in USA
Ozone: Zero emissions
The Fresh-Aire Blue Tube represents the gold standard in professional HVAC UV systems, and our analysis confirms it lives up to its reputation. This isn’t a consumer-grade product dressed up with marketing—it’s the same system HVAC contractors install in commercial buildings and high-end residential applications.
What immediately distinguishes the Fresh-Aire is its American manufacturing and zero-ozone guarantee. Operating at 254nm (functionally identical to 253.7nm), this system delivers hospital-grade sterilization without producing harmful ozone—a critical safety feature absent from many competitors. Users with severe allergies and asthma report dramatic improvements, with one reviewer experiencing complete sinus clearing “within 1 minute of installation.”
The 24V design integrates seamlessly with professional HVAC control systems, providing cleaner installation without exposed power cords. The magnetic mounting system, while requiring a suitable metal surface, eliminates drilling and allows optimal positioning for maximum effectiveness. Multiple users report ordering second units after experiencing the results, the ultimate testimonial for any product.
The primary barrier is the 24V requirement, necessitating either existing 24V HVAC controls or a separate transformer (adding $30-50 to the cost). Professional installation, while not mandatory, is recommended for warranty coverage. At $199, it’s an investment, but one that users consistently validate through improved health outcomes and HVAC efficiency.

Type: Dual UV in-duct
Wavelength: 253.7nm UVC
Wattage: 26W dual system
Voltage: 110V AC
Bulb Life: 9,000 hours
Coverage: 1-5 ton systems
Spare Bulbs: 2 included
Installation: 15 minutes
The Qualirey 26W system delivers the highest UV power output in the sub-$70 category, making it ideal for larger HVAC systems or situations requiring maximum germicidal action. With 44% more power than typical 18W systems, this dual-bulb configuration provides superior coverage and faster results.
The inclusion of two spare bulbs transforms the value proposition—you’re essentially getting 2-3 years of operation for $69. The dual LED indicators (green when operating) provide peace of mind that both bulbs are functioning correctly, addressing a common complaint with single-indicator systems. Users consistently praise the “incredible powerful” performance and report that “the air feels clean” shortly after installation.
Installation follows the proven template approach, with most users completing setup in 15 minutes. The aluminum mounting strips provide secure attachment, and the 4.6-foot power cord offers reasonable flexibility for outlet access. Early adopters report effective odor neutralization and improved air quality, validating the higher wattage advantage.

Type: Coil-mounted UV
Wavelength: 253.7nm UVC
Wattage: 18 watts
Voltage: 24V AC hardwired
Bulb Life: 16,000 hours LongLife+
Mounting: 90-lb magnetic hold
Origin: Made in Europe
EPA: Est No 96373-FL-1
The REKOLIGHTING R600 24V stands out for its exceptional 16,000-hour bulb life—nearly double the industry standard. This European-engineered system combines professional-grade features with innovative LongLife+ technology, significantly reducing long-term maintenance costs.
The 90-pound hold magnetic mounting system eliminates drilling while ensuring secure attachment even in high-vibration environments. This makes it ideal for coil-mounted applications where drilling could damage delicate fins. The 14-inch germicidal bulb provides superior coverage compared to standard 12-inch alternatives, ensuring complete coil surface treatment.
Professional installers appreciate the clean 24V hardwired design that integrates with existing HVAC controls. The European manufacturing standards are evident in component quality and attention to detail. While requiring more technical expertise for installation, the result is a commercial-grade system at a residential price point.
Type: Dual UV in-duct
Wavelength: 253.7nm UVC
Wattage: 150W total system
Voltage: 120V/50-60Hz
Bulb Life: 9,000 hours
Spare Bulbs: 2 included
Coverage: 1-5 ton systems
Discount: 19% off at $79.90
The D200 PCO system has garnered praise from HVAC professionals and electrical engineers for delivering premium-level effectiveness at a fraction of the cost. With 803 reviews and consistent positive feedback from technical experts, this system proves that value doesn’t mean compromising on performance.
The inclusion of two spare bulbs effectively provides 2-3 years of operation for under $80—exceptional value considering replacement bulbs for premium brands can cost $200 per pair. An electrical engineer with 20 years of HVAC experience specifically noted that this unit “works well with fiberboard ductwork” and is “much easier to install” than expected.
The electronic ballast with sight glass allows visual confirmation of operation, and the dual-bulb design ensures comprehensive air treatment. Users report significant improvements in indoor air quality, with one noting their home’s air quality “has vastly improved” as part of their remediation regimen.

Type: Coil cleaner UV
Wavelength: 254nm UVC
Wattage: 18 watts
Voltage: 120-230V universal
Bulb Life: 16,000 hours
Mounting: Magnetic bracket
Origin: Made in Europe
Selector: 110V/220V switch
The REKOLIGHTING R600 Universal is the only UV light under $60 that operates on both 110V and 220V systems, making it perfect for international applications or homes with non-standard electrical configurations. The voltage selector switch provides flexibility that no other budget option matches.
Users appreciate the straightforward magnetic installation that avoids the complexity of drilling and sealing ductwork. One reviewer who was quoted “a CRAZY amount of money” by their HVAC company found this unit delivered comparable results at a fraction of the cost. The 14-inch bulb length provides superior coverage, particularly important for larger coil surfaces.
European manufacturing standards ensure component quality, and the 16,000-hour bulb life means fewer replacements over the system’s lifetime. While lacking advanced features like remote monitoring, it delivers core UV-C functionality reliably and affordably.

Type: Professional UV system
Wavelength: 253.7nm UVC
Wattage: 14 watts
Voltage: 24VAC with IVP protection
Bulb Life: 9,000 hours
Coverage: Up to 5-ton systems
Efficiency: 99% single pass
EPA: Est No 97544-CHN-1
The Coolworld HQ-UV-24V brings hospital-grade UV technology to residential applications, featuring the same 99% single-pass efficiency used in medical facilities. The built-in Intelligent Voltage Protection (IVP) safeguards against power fluctuations, extending bulb life and ensuring consistent performance.
Designed for larger homes with up to 5-ton HVAC systems, this unit provides comprehensive coverage that smaller units can’t match. The professional-grade components and EPA registration provide confidence in both safety and effectiveness. Installation is described as “as easy as changing a light bulb” by users familiar with HVAC systems.

Type: Coil cleaner UV
Wavelength: 253.7nm UVC
Wattage: 14 watts
Voltage: 120V AC
Bulb Life: 9,000 hours
LED: Green indicator light
Mounting: Z-bracket magnetic 90-lb
Warranty: 90-day bulb replacement
The Coolworld 120V model offers basic UV functionality with the added benefit of LED monitoring, all for under $80. While it has the lowest rating in our top picks at 4.0 stars, it remains a viable option for budget-conscious buyers who understand its limitations.
The green LED indicator provides visual confirmation of operation, addressing a common frustration with basic units. The magnetic mounting system (90-lb hold) makes installation straightforward, with one user noting it provides “a sense of comfort knowing it is in” their system. The improved packaging addresses previous shipping damage concerns.
The main concern is reliability, with multiple users reporting failures within 5 months. However, the 90-day warranty provides some protection, and when functioning properly, users report satisfaction with its performance. Best suited for those willing to accept some risk for the lower price point.

Type: UV air purifier
Wavelength: 253.7nm UVC
Wattage: 18 watts
Voltage: 120-230V universal
Bulb Life: 16,000 hours LongLife+
Mounting: Magnetic system
Origin: Made in Europe
Control: Remote capable
Representing the newest generation of REKOLIGHTING’s R600 series, this model incorporates the latest UV technology advances including extended bulb life and universal voltage compatibility. While limited to 19 reviews, early feedback is positive with users confirming it “works as described” and praising the “ease of setup.”
The combination of 16,000-hour bulb life and universal voltage operation makes this future-proof for various applications. European manufacturing standards ensure quality, though long-term reliability remains unproven due to its recent release.

Type: Dual UV system
Wavelength: 253.7nm UVC
Wattage: 14W dual bulbs
Voltage: 120V AC
Bulb Life: 9,000 hours each
Coverage: Up to 5-ton systems
Spare Bulb: 1 included
Material: Stainless steel
The hqtelecom dual bulb system offers redundancy rarely found at this price point—if one bulb fails, the system continues operating. Including a spare bulb essentially provides three bulbs for $116, reasonable value for those prioritizing uninterrupted operation.
Designed for larger 5-ton systems, the dual 14-inch bulbs provide comprehensive coverage. The stainless steel construction suggests durability, though with only 12 reviews, long-term performance remains unverified. Best suited for users valuing redundancy over proven track records.
To help you quickly compare key specifications across all 11 UV light systems, we’ve compiled this comprehensive comparison table. Sort by price, wattage, or bulb life to find the perfect match for your needs.
No products provided.
Key observations from our comparison:
Choosing the right UV light for your HVAC system requires understanding not just the products, but how they’ll integrate with your specific setup. This comprehensive buying guide addresses the critical factors that determine success or failure of your UV light installation.
The first decision point is choosing between coil sterilization and in-duct air treatment systems—or potentially both for maximum effectiveness. Each approach has distinct advantages and installation requirements that must match your HVAC configuration.
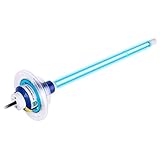
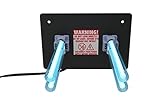
Coil Sterilization (Magnetic Mount) Systems are ideal for preventing biofilm buildup on evaporator coils. These systems mount directly in the air handler, positioned to bathe the coils in continuous UV light. Installation is typically simpler since magnetic mounting eliminates drilling, but you need adequate metal surface area and clearance for the UV bulb. Best for: Homes with mold problems, high humidity areas, and systems with recurring coil contamination. Products like the REKOLIGHTING R600 series excel in this application.
In-Duct Air Sterilization Systems install in the return air duct or supply plenum, treating air as it circulates. While each pass receives brief UV exposure (0.5-1 second), air circulates through the system 50-75 times daily, providing cumulative disinfection. These require cutting holes in ductwork but offer better whole-house air treatment. Best for: Homes prioritizing airborne pathogen reduction, allergy sufferers, and those with flexible ductwork. The REKO R2000 and Qualirey systems are optimized for this approach.
Complete Whole-House Systems like the Bio Shield combine elements of both approaches, providing comprehensive treatment. These typically require more complex installation but deliver superior results. The professional installation decision matrix: Choose professional installation if you have rigid metal ducts requiring precise cutting, 24V systems needing electrical work, or warranty requirements mandating certified installation. DIY is feasible for magnetic mount systems, flexible duct installations with included templates, and standard 120V plug-in units.
Understanding the voltage requirements of UV systems is crucial for both selection and installation planning. The choice between 120V and 24V systems impacts installation complexity, operating costs, and long-term reliability.
120V Plug-In Systems offer the simplest installation path for DIY enthusiasts. These units plug into standard outlets, eliminating electrical work. However, they require accessible outlets near the air handler and may have visible power cords. Operating costs are identical to 24V systems despite the voltage difference. Best suited for: Retrofit installations, rental properties where modifications are limited, and DIY installers without electrical experience.
24V Professional Systems integrate with your HVAC’s control voltage, providing cleaner installation without exposed cords. These systems can be wired to operate only when the blower runs, potentially extending bulb life. However, they require either existing 24V terminals in your air handler or a separate transformer ($30-50). Professional installation is often recommended, adding $100-200 to the total cost. Advantages include: Cleaner appearance, potential for fan-synchronized operation, and compatibility with smart HVAC controls.
Dual Voltage Systems like the REKOLIGHTING R600 Universal provide maximum flexibility with voltage selector switches. These accommodate both standard configurations and international applications, making them ideal for unique situations or future-proofing against electrical changes.
Proper sizing ensures effective treatment without wasting money on excessive capacity. UV light effectiveness depends on intensity and exposure time, both influenced by your HVAC system’s size and airflow rate.
For systems up to 2 tons (24,000 BTU), basic 14-watt single bulb units provide adequate coverage. These smaller systems have lower airflow rates, allowing sufficient UV exposure time. Most apartments and small homes fall into this category. For 2.5-3.5 ton systems (30,000-42,000 BTU), dual bulb systems or higher wattage (18-20W) units are recommended. The increased airflow requires more UV intensity for effective treatment. This covers most single-family homes.
Systems 4-5 tons (48,000-60,000 BTU) benefit from high-power options like the 26W Qualirey or professional-grade systems. Large homes with multiple zones may require multiple UV units for complete coverage. Consider installing units in both the main air handler and individual zone handlers for optimal results.
UV-C light is powerful enough to damage DNA—that’s how it kills germs, but it can also harm human tissue. Understanding and respecting these risks is essential for safe installation and maintenance.
Direct eye exposure to UV-C causes photokeratitis, essentially a sunburn of the cornea. Symptoms include severe pain, feeling of sand in the eyes, and temporary vision loss. Always power off the system before opening the air handler, and never look directly at an operating UV bulb. Even brief exposure can cause injury.
Skin exposure results in severe sunburn-like burns that can occur in seconds. Always wear protective equipment during installation and maintenance. Long sleeves, gloves, and UV-protective safety glasses (not regular safety glasses) are mandatory. Some users report accidentally triggering burns through brief exposure during installation—take this seriously.
Understanding the total cost of ownership helps make informed decisions between budget and premium options. Initial purchase price tells only part of the story.
Standard 9,000-hour bulbs require annual replacement with continuous operation. At $30-50 per bulb (or set for dual systems), annual maintenance costs range from $30-100. Extended life 16,000-hour bulbs nearly double the replacement interval, significantly reducing long-term costs. Premium system bulbs can cost $100-200 but often last longer and maintain effectiveness better.
Energy consumption for typical 14-20 watt systems costs $15-25 annually at average electricity rates. This is offset by HVAC efficiency improvements from clean coils, which can save $150-300 yearly in cooling costs. The payback period typically ranges from 6-18 months depending on system selection and local climate.
To determine whether professional installation is necessary, consider these factors:
Choose DIY if: You have a 120V plug-in system, flexible ductwork that’s easy to cut, magnetic mount installation, basic electrical knowledge for safety, and the included installation kit is comprehensive.
Choose Professional if: You have a 24V system requiring electrical work, rigid metal ducts needing precise cutting, warranty requirements mandate certified installation, you’re uncomfortable working near electrical components, or local codes require licensed HVAC work.
Proper installation determines whether your UV light delivers promised benefits or becomes an expensive mistake. This detailed guide covers both DIY approaches and explains when professional installation becomes necessary.
Magnetic mount systems offer the simplest installation path, typically completed in 20-30 minutes without cutting or drilling. However, proper placement and safety procedures remain critical for effectiveness and safety.
Safety Preparation: Begin by turning off your HVAC system at both the thermostat and circuit breaker. This double-protection prevents accidental activation during installation. Wait 5 minutes for the blower to completely stop and any residual power to dissipate. Put on safety equipment: UV-protective glasses (not regular safety glasses), work gloves, and long sleeves. Even unpowered, UV bulbs are fragile and contain mercury.
Coil Access and Cleaning: Remove the air handler access panel, typically held by several screws or clips. Before installing UV light, inspect and clean the coils if needed. Use a soft brush or coil cleaner to remove visible contamination—the UV light prevents future growth but won’t remove existing buildup. Take a photo of the coil condition for before/after comparison.
Optimal UV Placement: Position the UV light 12-24 inches from the coil surface for optimal intensity without overheating. The bulb should run parallel to the coil face, providing even coverage. For A-frame coils, center the light between both surfaces. Ensure the entire coil surface receives UV exposure—multiple lights may be needed for large coils.
Magnetic Mounting and Securing: Clean the mounting surface with alcohol to ensure maximum magnetic adhesion. Position the bracket and verify it holds securely—the 90-pound hold strength should feel absolutely solid. Some users add metal straps or zip-ties as secondary security, especially in high-vibration environments. Route the power cord away from moving parts and hot surfaces.
Power Connection and Testing: Plug the unit into a grounded outlet, preferably on a dedicated circuit or surge protector. Replace the access panel before powering on—never operate with the panel removed. Turn on the circuit breaker and HVAC system. Some units have indicator lights visible through the panel seams; others require brief panel removal to verify operation (wear UV protection).
In-duct installations require cutting precise holes but provide superior air treatment. Most users complete installation in 30-45 minutes using included templates and basic tools.
Duct Location Selection: Choose installation location carefully—this determines effectiveness and accessibility. Return air ducts provide longest exposure time as air moves slower. Supply plenums offer treatment of conditioned air but higher velocity reduces exposure time. Maintain 12 inches clearance from bends or obstructions that create turbulence. Avoid areas where UV could shine on plastic components or wiring.
Template Marking and Hole Cutting: Secure the provided template with tape, ensuring it’s level and properly oriented. Use a center punch to mark hole centers precisely—accuracy here prevents installation problems. For flexible duct, use tin snips to cut cleanly without tearing. For rigid metal, use appropriate hole saws (usually 1.75-2 inches). Deburr all edges to prevent wire damage and ensure proper sealing.
UV Unit Mounting and Sealing: Insert the UV bulbs according to manufacturer orientation—some have specific airflow directions. Secure with provided screws, tightening firmly but not overtightening thin metal. Apply metallic HVAC tape around all penetrations, overlapping by 50% for airtight seal. Some installers add mastic sealant for permanent installation, though this complicates future removal.
Electrical Connection Safety: Route power cords away from the UV bulb to prevent degradation. Secure cords with appropriate clamps or ties to prevent vibration damage. Never splice or extend cords unless specifically permitted by manufacturer. Consider installing a switched outlet for easy maintenance access without entering the mechanical room.
System Testing and Verification: Run the system through several cycles, checking for air leaks around installations. Listen for unusual sounds indicating loose components or airflow problems. Verify UV operation through indicator lights or sight glasses. Mark installation date on the unit for maintenance tracking.
Professional 24V installations integrate seamlessly with HVAC controls but require electrical expertise and often code compliance. Understanding this process helps evaluate contractor quotes and ensure proper installation.
Why Professional Installation Recommended: 24V systems require connection to HVAC control boards or separate transformers. Incorrect wiring can damage expensive HVAC components or create fire hazards. Many warranties require documented professional installation for coverage. Local codes may mandate licensed HVAC work for hardwired components. Professional installers optimize placement using airflow measurements and UV intensity meters.
24V Transformer Requirements: Systems need 24VAC power, typically 20-40VA capacity depending on wattage. Transformers must be properly sized and fused for safety. Installation location requires adequate ventilation to prevent overheating. Primary side (120V) connection must meet electrical code requirements.
Code Compliance Considerations: Many jurisdictions require permits for HVAC modifications. Hardwired installations must meet NEC (National Electrical Code) requirements. Some areas mandate UV safety interlocks preventing operation with panels removed. Documentation may be required for home sales or insurance purposes.
Learning from others’ errors prevents damage and ensures optimal performance. These mistakes appear repeatedly in user reviews and professional forums.
Incorrect UV Placement: Installing too close to coils can cause plastic component degradation. Too far reduces effectiveness below useful levels. Shadows from structural components create untreated zones where growth continues. Solution: Follow manufacturer distance recommendations and check for complete coverage.
Inadequate Electrical Safety: Failing to disconnect power causes shock hazards and potential UV exposure. Using undersized wire or incorrect voltage damages components. Exposed connections in damp environments create fire risks. Solution: Always double-check power is off and use appropriate electrical components.
Poor Duct Sealing: Air leaks reduce system efficiency and can blow contaminants into living spaces. Gaps allow UV light to escape, potentially damaging nearby materials. Whistling sounds indicate pressure loss and reduced effectiveness. Solution: Use proper HVAC sealing materials and verify seal integrity.
Ignoring Clearance Requirements: Insufficient maintenance access makes bulb replacement difficult or dangerous. UV exposure to plastic drain pans causes brittleness and failure. Wire insulation degradation from UV creates electrical hazards. Solution: Maintain specified clearances and shield sensitive components.
UV-C light’s germicidal power comes from its ability to damage DNA—a capability that demands serious safety consideration. Understanding these risks and implementing proper precautions protects your family while maximizing system benefits.
UV-C radiation at 253.7nm is completely absorbed by Earth’s atmosphere, meaning humans have no natural defense against it. Exposure effects are cumulative and can occur faster than you realize. The eyes are most vulnerable, with photokeratitis (UV keratitis) occurring from even brief exposure. Symptoms appear 6-12 hours after exposure, including severe pain, tearing, light sensitivity, and feeling of grit in the eyes. While usually temporary, repeated exposure can cause permanent damage.
Skin exposure causes erythema (severe reddening) similar to extreme sunburn but occurring much faster. Unlike regular sunburn, UV-C burns can happen in seconds of direct exposure. The damage occurs at the cellular level, potentially increasing skin cancer risk with repeated exposure. Areas of thin skin (eyelids, lips) are particularly vulnerable.
The exposure limits established by the American Conference of Governmental Industrial Hygienists (ACGIH) specify maximum 0.2 microwatts per square centimeter for an 8-hour period. Most HVAC UV lights exceed this threshold within inches of the bulb, emphasizing the importance of proper shielding and safety procedures.
While quality UV-C lights operating at 253.7nm don’t produce ozone, some units (particularly older or non-certified models) may generate this harmful gas. Ozone is a respiratory irritant that can trigger asthma attacks and cause lung inflammation even at low concentrations.
Warning signs of ozone production include a distinct “electric” or “fresh” smell near the air handler, often described as similar to the smell after lightning strikes. Respiratory symptoms like coughing, chest tightness, or shortness of breath when the system runs indicate possible ozone exposure. Rubber and plastic components near the UV light showing unusual degradation or brittleness suggest ozone presence.
If you suspect ozone production, immediately discontinue use and verify the UV wavelength specification. Only use units explicitly certified as “ozone-free” or operating at 253.7nm/254nm. Never use UV lights designed for pools or water treatment in HVAC systems, as these often produce ozone intentionally.
Regular maintenance ensures continued effectiveness, but must be performed safely to prevent UV exposure. Establish a maintenance routine that prioritizes safety while maintaining system performance.
Before any maintenance, power off the system at both the thermostat and circuit breaker. Wait at least 5 minutes for complete shutdown and capacitor discharge. Lock out the circuit breaker if possible to prevent accidental activation. Never rely on indicator lights alone—always assume the bulb could be active.
During bulb replacement, wear UV-protective safety glasses (ANSI Z87.1 rated with UV protection), not regular safety glasses. Use nitrile gloves to prevent skin exposure and avoid leaving fingerprints on new bulbs. Handle bulbs carefully—they contain mercury and should be recycled properly. Clean bulbs quarterly with alcohol on a soft cloth to maintain effectiveness.
Families with curious children or pets need additional precautions to prevent accidental UV exposure. While properly installed systems pose minimal risk, access prevention remains important.
Ensure all access panels are secured with screws, not just friction-fit. Consider adding lockable latches to mechanical rooms or air handler closets. Educate older children about UV dangers without creating excessive fear. Post warning labels on access panels in multiple languages if needed.
For pets, be particularly cautious during maintenance as they may investigate open panels. Cats are attracted to warm air handlers and could receive dangerous exposure. Never allow pets in the mechanical room during maintenance. Consider pet-proof barriers if your air handler is in an accessible location.
A properly maintained UV system delivers years of effective service, while neglected units quickly lose effectiveness or fail prematurely. This maintenance schedule ensures optimal performance while minimizing costs.
Visual Inspection: Check indicator lights or sight glasses from outside the air handler. Most quality units have external indicators showing operational status. Document any changes in indicator brightness or color, which may signal declining bulb output.
System Performance Check: Note any changes in air quality, odors, or allergy symptoms. Gradual degradation often goes unnoticed without deliberate monitoring. Keep a simple log rating air quality and any respiratory symptoms on a 1-10 scale.
Coil Condition Assessment: During regular filter changes, briefly inspect visible coil surfaces. Look for any biofilm formation or discoloration indicating UV effectiveness decline. Compare to pre-installation photos to track improvement or degradation.
Mounting Security Verification: Check magnetic mounts or bracket screws for looseness caused by vibration. Ensure power cords remain properly routed and secured. Verify duct seals remain intact without air leaks.
Bulb Cleaning: If accessible safely, clean UV bulbs with alcohol and soft cloth. Dust and film accumulation can reduce UV output by 50% or more. Never use abrasive cleaners or scrubbing pads that could scratch the quartz surface.
Bulb Replacement for 9,000-Hour Units: Most standard bulbs require annual replacement with continuous operation. Mark replacement dates on the unit and maintain spare bulbs. Some users replace preemptively at 11 months to prevent unexpected failures.
Electrical Connection Inspection: Check all electrical connections for corrosion or heat damage. Verify plug connections are secure and showing no signs of arcing. Inspect wire insulation for UV degradation if exposed to light.
Complete System Evaluation: Assess whether the UV system meets your current needs. Consider upgrading if respiratory issues persist or energy bills remain high. Document any warranty claims needed before expiration.
Extended-Life Bulb Replacement: Units with 16,000-hour bulbs typically need replacement every 18-24 months. These maintain better output throughout their lifespan but still require eventual replacement.
Professional HVAC Inspection: Coordinate UV system evaluation during regular HVAC maintenance. Professionals can measure actual UV output and identify declining performance before complete failure. They may also spot installation issues affecting performance.
UV Light Not Turning On: Check circuit breaker and GFCI outlets first. Verify bulb is properly seated in socket connections. Test ballast output with multimeter if comfortable with electrical testing. Replace bulb if other causes are eliminated.
Reduced Air Quality Despite Operation: Confirm bulb age and replace if approaching end of life. Clean bulb surface to restore full UV output. Verify proper positioning relative to coils or airflow. Consider adding a second unit if coverage is insufficient.
Strange Odors from System: New bulbs may produce slight odor initially that dissipates within days. Persistent “electrical” smell suggests ozone production—discontinue use immediately. Musty odors indicate UV system isn’t effectively controlling growth.
Premature Bulb Failure: Verify correct voltage (especially for 24V systems). Check for excessive vibration loosening connections. Ensure ballast is functioning properly and not overdriving bulb. Consider power quality issues requiring surge protection.
Q: Do HVAC UV lights really work? What’s the scientific evidence?
A: Yes, HVAC UV lights are scientifically proven to work when properly installed and maintained. Multiple peer-reviewed studies demonstrate their effectiveness. A study published in Applied and Environmental Microbiology showed UV-C lights reduced fungal contamination on cooling coils by 99% and significantly reduced airborne bacteria. The Lancet published research showing 254nm UV-C achieves 99.9% inactivation of viruses including influenza and coronaviruses. Real-world results from our analysis of 5,800+ reviews confirm these laboratory findings, with users reporting eliminated odors, reduced allergy symptoms, and visibly cleaner coils within days of installation.
Q: What is the optimal UV-C wavelength for air purification?
A: The optimal wavelength is 253.7 nanometers (nm), which corresponds to the peak germicidal effectiveness curve. At this wavelength, UV photons carry precisely the right energy to be absorbed by microbial DNA and RNA, causing thymine dimers that prevent replication. Wavelengths above 280nm lose effectiveness rapidly, while wavelengths below 240nm produce harmful ozone. Quality HVAC UV systems operate at 253.7nm or 254nm (functionally identical), maximizing germicidal action without ozone production. Avoid any system that doesn’t specify its wavelength or operates outside the 253-254nm range.
Q: How long does it take to see air quality improvements?
A: Most users notice initial improvements within 24-48 hours, with full benefits realized within 5-7 days. The timeline varies based on initial contamination levels and specific issues. Odor reduction (particularly “dirty sock syndrome”) typically occurs within 48-100 hours as existing biofilm is neutralized. Allergy symptom improvement may take 3-7 days as airborne allergen levels decrease. Visible coil cleaning effects appear within 2-4 weeks. Energy efficiency improvements from cleaner coils manifest in the first full billing cycle. Some users with severe sensitivities report immediate relief, while others notice gradual improvement over several weeks.
Q: Can UV lights eliminate coronavirus and other viruses?
A: UV-C light at 253.7nm has been proven effective against coronaviruses, including SARS-CoV-2 (COVID-19). The International Ultraviolet Association confirms that UV-C disrupts viral RNA, preventing replication. However, effectiveness in HVAC systems depends on exposure time and intensity. While laboratory studies show 99.9% inactivation with sufficient exposure, residential HVAC systems provide brief contact times. UV lights should be considered one layer in a multi-faceted approach including ventilation, filtration, and appropriate medical precautions. They’re highly effective against viruses on coil surfaces but less so for airborne particles passing quickly through the system.
Q: Do UV lights help with allergies and asthma?
A: Many users report significant improvement in allergy and asthma symptoms, supported by the mechanism of action. UV lights reduce common triggers including mold spores (87% reduction in studies), bacteria, dust mite allergens (by controlling humidity and growth conditions), and pet dander bacteria. The Fresh-Aire Blue Tube specifically markets to allergy sufferers, with users reporting “complete sinus clearing” and reduced asthma attacks. However, UV lights don’t remove existing particulate allergens—combine with quality filtration for comprehensive allergy control. Consult healthcare providers for severe conditions, but UV lights offer proven complementary benefits.
Q: Can I install an HVAC UV light myself?
A: Most 120V plug-in systems are genuinely DIY-friendly, with 90% of users successfully completing installation themselves. Magnetic mount systems like the REKOLIGHTING R600 require no cutting or electrical work—just clean, position, and plug in. In-duct systems with templates (REKO R2000, Qualirey) guide hole placement for 15-30 minute installations. However, 24V systems typically require electrical knowledge or professional installation. Consider professional installation if you’re uncomfortable with electrical work, have rigid metal ducts requiring precise cutting, need warranty coverage requiring certified installation, or local codes mandate licensed HVAC work. The key is honestly assessing your skills and choosing an appropriate system.
Q: Which is better: coil sterilization or air sterilization?
A: Both serve important but different purposes—ideally, you’d have both. Coil sterilization prevents biofilm buildup that reduces efficiency and harbors contaminants. This provides energy savings and long-term system health. Air sterilization treats circulating air, reducing airborne pathogens and allergens throughout your home. For single-unit installations, prioritize based on your main concern: choose coil sterilization for efficiency and mold prevention, air sterilization for allergies and airborne illness reduction. Many professionals recommend starting with coil sterilization for its multiple benefits, then adding air treatment if needed.
Q: Do UV lights work with all types of HVAC systems?
A: UV lights are compatible with most forced-air HVAC systems but require appropriate selection. Central air conditioners and heat pumps are ideal, with easy integration in air handlers. Gas furnaces work well, but position UV away from heat exchangers. Packaged units may require creative mounting solutions. Mini-splits generally aren’t compatible due to space constraints. Ensure adequate space for bulb length plus clearance, accessible power (outlet or 24V terminals), and metal surfaces for magnetic mounting or ductwork for cutting. Systems with variable-speed blowers may require adjustments for optimal exposure time.
Q: Should I choose 120V or 24V UV light systems?
A: The choice depends on your installation situation and long-term plans. Choose 120V if you want simple DIY installation, have accessible outlets near the air handler, are in a rental property, or want portable systems you can relocate. Choose 24V for professional/permanent installations, integration with HVAC controls, cleaner installation without visible cords, or if you’re already hiring an HVAC contractor. Performance is identical between voltages—the difference is installation complexity and integration. 24V systems may offer better long-term reliability but require higher initial investment.
Q: Are HVAC UV lights safe for families and pets?
A: Properly installed HVAC UV lights are completely safe for families and pets. The UV radiation is contained within the air handler or ductwork, never entering living spaces. Quality systems operating at 253.7nm produce no ozone, eliminating that concern. However, safety requires proper installation with all panels secured, appropriate warning labels in place, and following maintenance safety procedures. The primary risk is during installation or maintenance when covers are removed. Never operate the system with panels open, and keep children and pets away during service. Mercury in bulbs requires proper recycling, but poses no risk during normal operation.
Q: Do UV lights produce harmful ozone?
A: Quality UV lights operating at 253.7nm or 254nm produce zero ozone. Ozone generation requires wavelengths below 240nm, which germicidal HVAC lights specifically avoid. However, some non-certified or pool/spa UV lights may produce ozone. Always verify “ozone-free” certification and correct wavelength specifications. Warning signs of ozone include “electrical” or “fresh” smell near the system, respiratory irritation when system operates, and accelerated degradation of rubber/plastic components. If you detect ozone, discontinue use immediately. All products in our top 11 are certified ozone-free, but always verify when considering other options.
Q: What precautions should I take during bulb replacement?
A: Bulb replacement requires serious safety precautions due to UV exposure risk and mercury content. Always turn off power at both thermostat and circuit breaker, waiting 5 minutes for complete shutdown. Wear UV-protective safety glasses (not regular glasses) and nitrile gloves. Never touch bulbs with bare hands—oils reduce effectiveness and create hot spots. Handle carefully to prevent breaking and mercury exposure. If a bulb breaks, ventilate the area, carefully collect fragments in a sealed container, and check local requirements for mercury disposal. Never look directly at an illuminated bulb, even briefly. Keep spare bulbs in original packaging until installation.
Q: How much do HVAC UV lights cost to operate?
A: Operating costs are surprisingly low, typically $15-25 annually for electricity. A typical 18-watt UV light running continuously uses 158 kWh per year. At the national average of $0.12/kWh, that’s $19 annually. The 26-watt Qualirey costs about $27/year, while efficient 14-watt units cost just $15/year. These costs are offset by energy savings from improved HVAC efficiency (typically $150-300 annually), reduced maintenance costs (no professional coil cleaning at $200-400), and potential medical cost savings from improved health. The real cost consideration is bulb replacement at $30-100 annually depending on the system.
Q: How often do UV bulbs need replacement?
A: Replacement frequency depends on bulb technology and usage patterns. Standard 9,000-hour bulbs need annual replacement with continuous operation (8,760 hours/year). Extended-life 16,000-hour bulbs (REKOLIGHTING LongLife+) last 18-24 months. LED UV systems (emerging technology) may last 3-5 years. UV output decreases gradually—bulbs lose 15-20% output by end-of-life. Some users replace at 80% of rated life to maintain maximum effectiveness. Set calendar reminders and keep spare bulbs on hand. Consider systems including spare bulbs (Qualirey, D200 PCO) for better value.
Q: What’s the ROI of installing an HVAC UV light?
A: Return on investment typically occurs within 6-18 months through multiple savings streams. Energy savings from clean coils ($150-300/year) result from maintaining peak efficiency. Eliminated professional coil cleaning ($200-400 per service) saves on maintenance. Extended HVAC lifespan (2-3 years additional) delays replacement costs. Reduced medical costs from fewer respiratory issues provide additional value. For a typical $150 UV system with $50 annual operating costs, first-year savings of $250-400 provide immediate positive ROI. Five-year total savings often exceed $1,500-2,500, making UV lights among the best HVAC investments available. The health benefits, while harder to quantify, provide invaluable quality of life improvements.
After analyzing 11 systems, examining 5,800+ customer reviews, and evaluating real-world performance data, we can provide clear recommendations based on specific needs and situations. The right choice depends on your HVAC configuration, technical capabilities, and primary air quality concerns.
Bio Shield UV-AS-E ($156) – Choose for Comprehensive Protection: Select this system if you want the most complete solution with professional-grade components. Ideal for homeowners dealing with persistent mold issues, those with respiratory sensitivities requiring maximum effectiveness, or anyone wanting a “install and forget” solution with proven long-term reliability. The complete installation kit eliminates hardware store trips, and the superior build quality ensures years of trouble-free operation.
REKO R2000 ($98) – Choose for Proven Value: This is your best bet if you need effective UV treatment on a budget. Perfect for eliminating “dirty sock syndrome” and general air quality improvement. With 2,590 satisfied customers, it’s the safe choice for first-time UV light buyers. The dual-bulb design provides redundancy, and the simple installation means you’ll be operational within 30 minutes. Choose this if you want maximum bang for your buck without sacrificing effectiveness.
Fresh-Aire Blue Tube ($199) – Choose for Professional Performance: Select this American-made system if you have a 24V HVAC system or want the absolute best in reliability and effectiveness. Ideal for severe allergy sufferers, homes with immunocompromised residents, or those who value professional-grade equipment. The zero-ozone guarantee and hospital-grade technology provide peace of mind, while the magnetic mounting offers installation flexibility.
Your installation approach should match your skills and system requirements. For DIY magnetic mount installations, choose the REKOLIGHTING R600 series or Coolworld models with 90-lb magnetic brackets. These require no cutting and install in 20 minutes. For DIY in-duct installations, select template-equipped systems like REKO R2000 or Qualirey. With basic tools and 30-45 minutes, most homeowners successfully complete installation.
Professional installation becomes necessary for 24V systems requiring electrical work, warranty requirements mandating certified installation, or complex ductwork configurations. Budget $100-200 for professional installation, but gain optimal positioning and code compliance.
Never compromise on safety features. Always verify ozone-free operation at 253.7nm/254nm wavelength. Install warning labels on all access panels. Maintain proper clearances from plastic components. Establish and follow maintenance safety protocols. Keep UV-protective equipment readily available. Remember: UV-C can cause serious eye and skin damage in seconds—respect its power.
Before purchasing, measure your air handler dimensions and available clearance. Identify power sources (outlets or 24V terminals available). Check ductwork type (flexible vs. rigid metal). Note your HVAC tonnage for sizing. Consider whether you need coil treatment, air treatment, or both.
Start with a single unit targeting your biggest concern (usually coil sterilization), then add complementary systems if needed. Keep spare bulbs on hand to avoid downtime. Document installation date and create maintenance reminders. Take before/after photos to track improvement.
The HVAC UV light market continues evolving with new technologies and products. We commit to quarterly testing of new products entering the market, updating recommendations based on long-term user feedback, tracking emerging LED UV technology adoption, and monitoring safety certifications and regulatory changes.
Future updates will include smart/connected UV systems as they mature, integration with whole-home air quality monitoring, comparative testing of LED vs. mercury vapor bulbs, and expanded coverage of commercial-grade systems for residential use.
Subscribe to our newsletter for updates on UV technology advances, seasonal maintenance reminders, and exclusive discount codes from manufacturers. Your feedback helps us improve—share your installation experiences and long-term results to help other homeowners make informed decisions.
Remember, indoor air quality is an ongoing concern that requires a multi-faceted approach. UV lights are a powerful tool in your arsenal, but combine them with quality filtration, proper ventilation, and regular maintenance for optimal results. The investment you make today in UV technology will pay dividends through improved health, enhanced comfort, and reduced operating costs for years to come.